


Description
How do I enter an event on guidle?
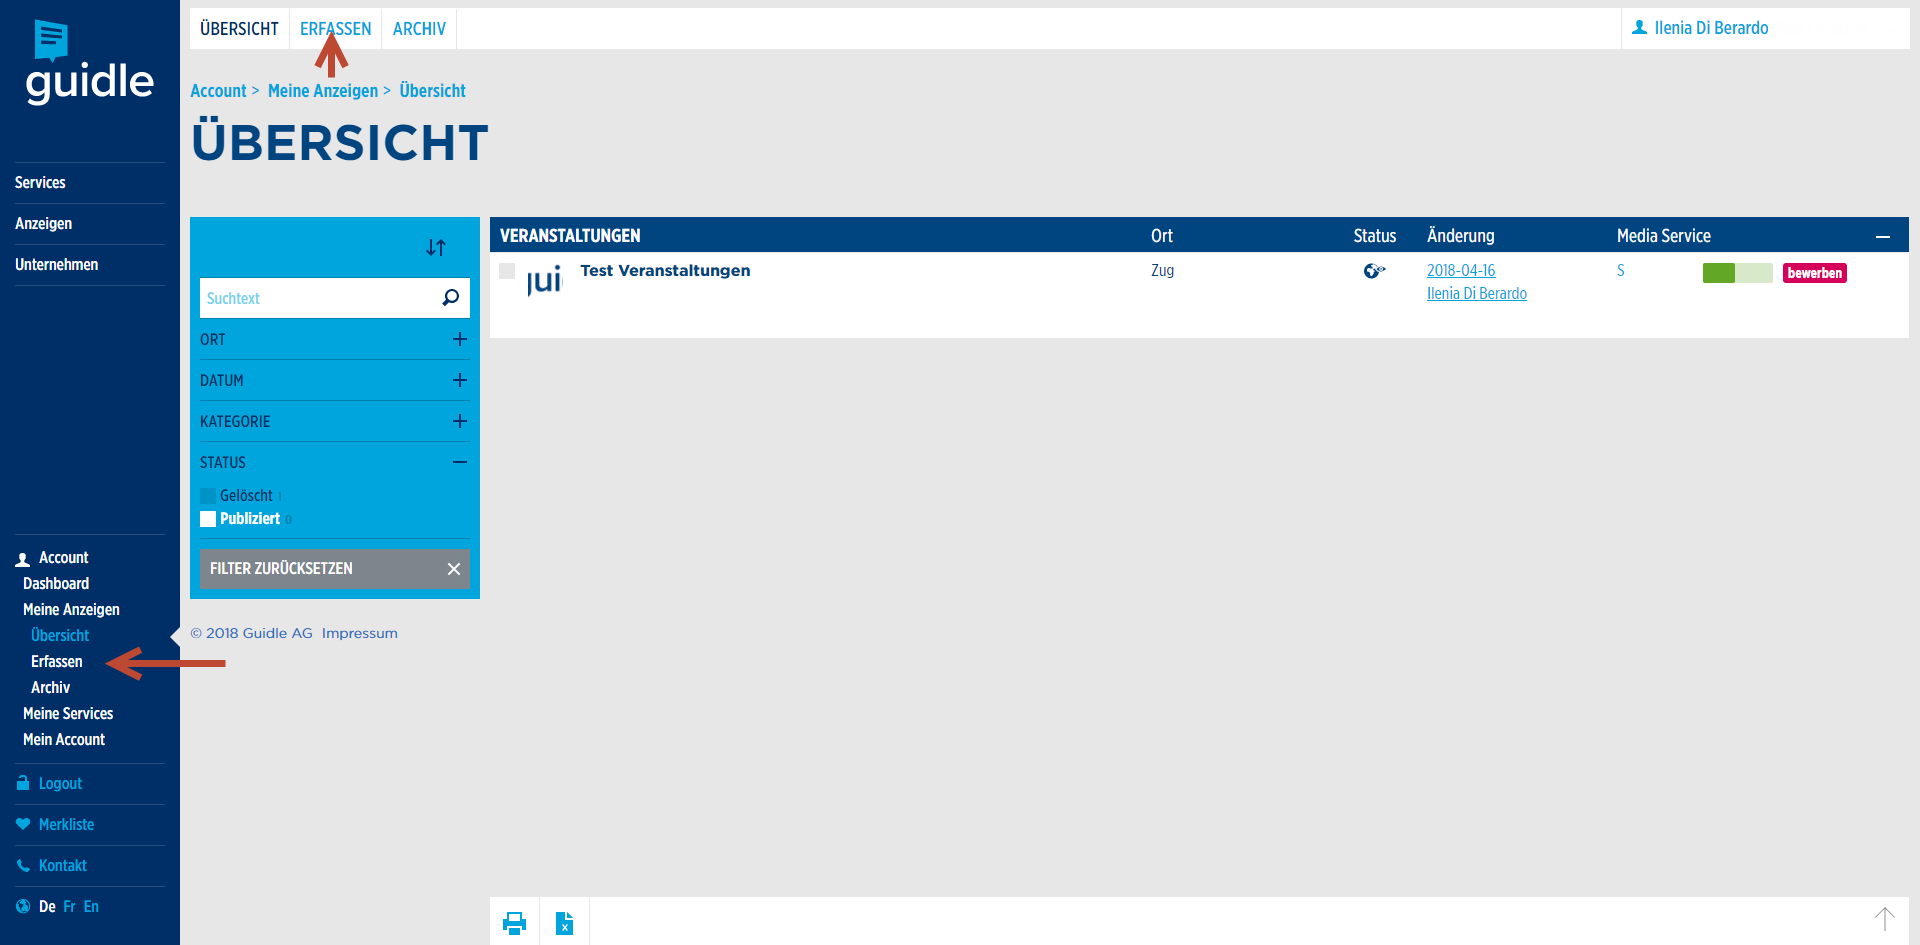
1. Access guidle
Log in to www.guidle.com/en/login or any other portal of guidle.
2. enter / edit
To create a new ad, click on Create Ad or on My Ads and then on Create.
To edit an existing ad, click on My Ads, hover over the ad you want to edit and click on Edit.
When entering or editing an ad, you will be guided through the same process.

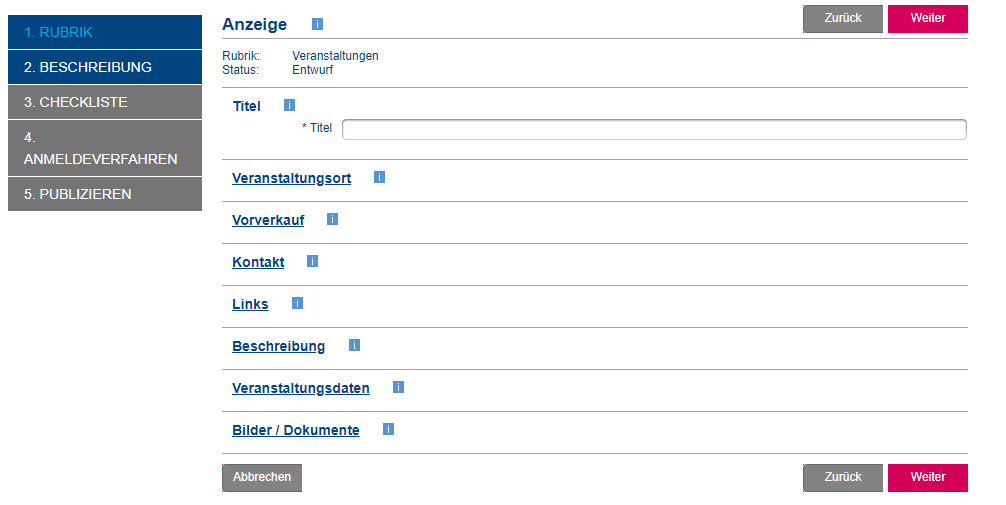
2.1 Heading
The selection for the rubric is located in the first entry point.
Here you select the event.
Important: It is absolutely necessary to select a rubric, otherwise the ad cannot be assigned to a suitable feature and will therefore not be published.

Then click on Next.
2.2 Description / Display
The Description window appears.
2.2.1 Title
Enter the event title, a maximum of 70 characters is allowed.
Event date or location should not be entered in the title, but in the fields provided for this purpose.

2.2.2. address
Where will the event take place?
You can search for an existing address from the public address book or enter your own address.
2.2.2.1 Public address book
Using a public address offers several advantages:
- Less data entry effort
- Correct address data, incl. geo-coding for display on Google Maps
- For queries of the type "Show me all events taking place at the Kongresshaus Zürich", your event will only be listed if it is linked to the corresponding address.

2.2.2 Own address
If your desired event location is not available in the public address book, you can create your own address and transfer it to your personal address book if required.

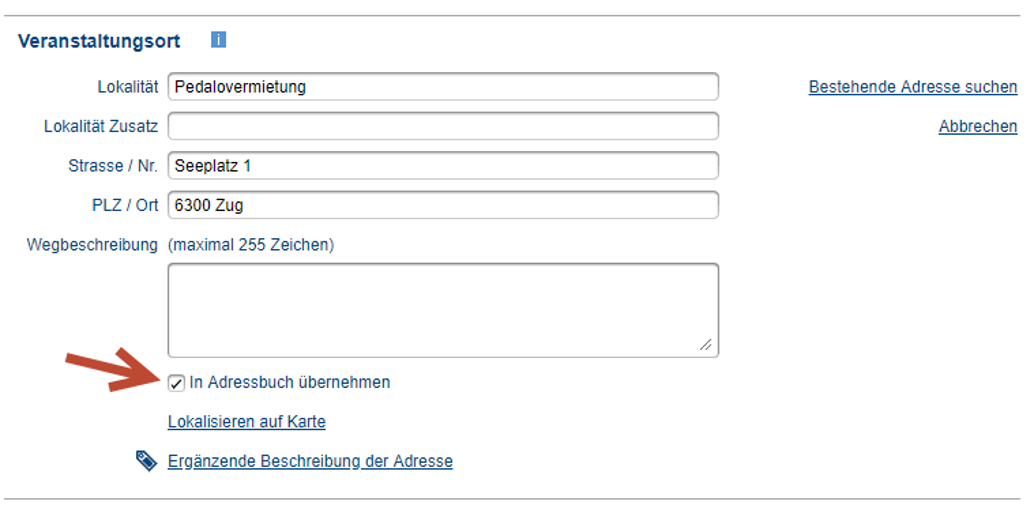
In addition, you have the possibility to specify the exact location on the map and select other features, such as accessibility.
2.2.3 Advance sale
You may enter information about the advance sale. If there is no presale, you can leave the two fields empty.

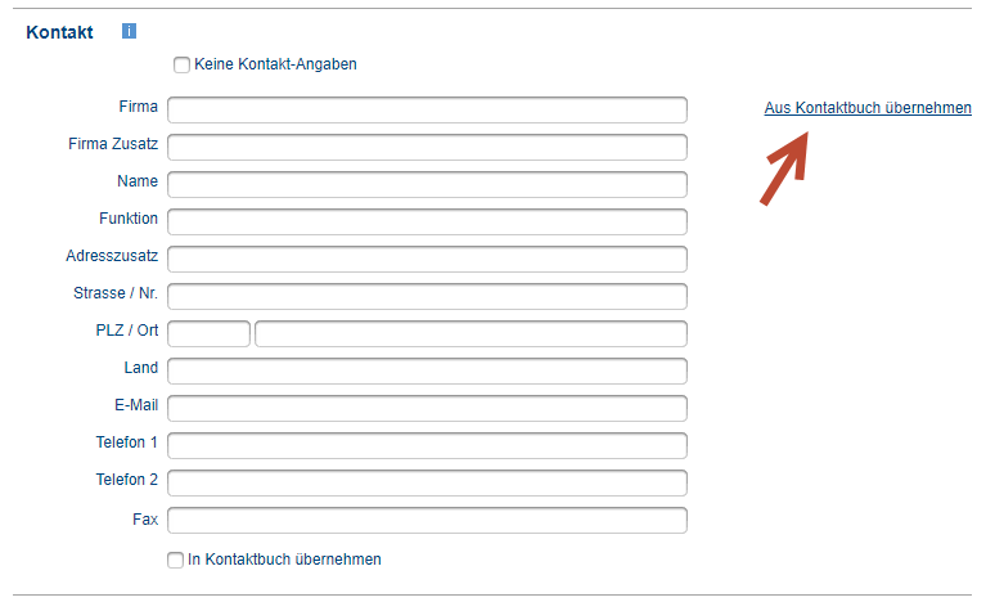
2.2.4. contact
You can enter your contact details here. These can be saved to your guidle contact book.
By saving the contact address in your personal contact book, the address will be retrievable later and does not always have to be typed in from the beginning.
2.2.5 Links
Enter the homepage URL of the event or organizer here. Only one URL may be entered per field.
Important: Enter the URL with https:// or http://. If you are not sure which protocol of the two you should use, it is best to copy the entire URL directly from the browser. This will automatically insert the correct protocol.

Important: Capture the URL that points to your video file, not the URL to the web page where your video is embedded.
The following formats are supported:
- .flv (Flash video)
- .mp4, .mov, .f4v (encoded according to standard H.264 codec)
- .webm (VP8 / WebM; but will only play in browsers with HTML5 support)
- .ogv (Ogg Theara; will only be played in browsers with HTML5 support)
- youtube link (e.g. https://www. youtube.com/watch?v=eU0wAwFWj4A)
- vimeo link (e.g. https://vimeo. com/46604447)
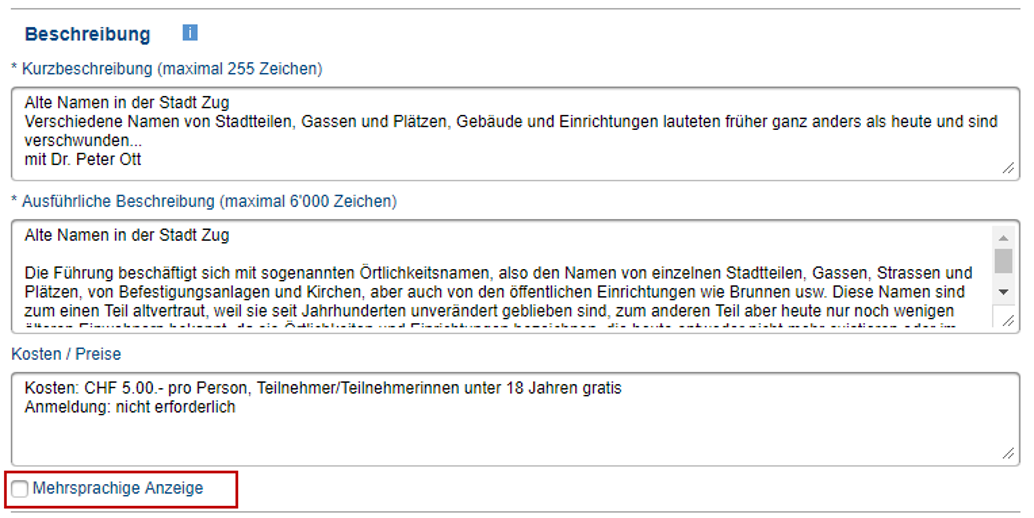
2.2.6. description
Under Description you can enter a short summary of your event in the short description.
In the long description you can then add the entire detailed description of the event.
These two texts are not always visible together, so it is important that the most important text contents, which are visible in the short description, are also in the long description.
You can also include information about costs and prices, for example, if you have entrance fees.
You can add additional language versions to the display by clicking on Multilingual display.
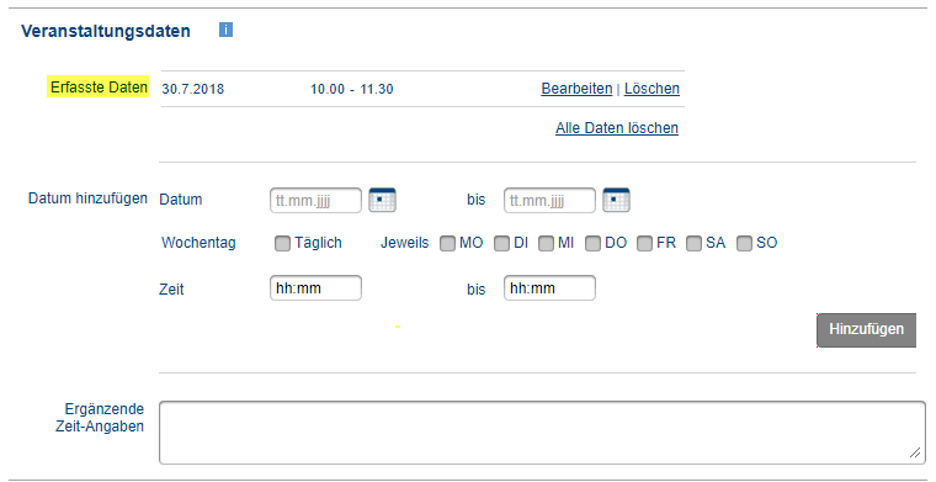
2.2.7 Event data
You can enter the event data here and submit it by clicking Add.
Afterwards the view of the entered data will be adjusted and you can add further data - if available.
Important: Enter the time either with a period or a colon.

2.2.8 Pictures / Documents
Here you can add pictures or PDF files if necessary. Images appear in a carousel above the text, while a PDF is displayed in the download section.

Click on Browse and select the desired file. You can still give the file a name.
Important: For documents, it is mandatory to specify a name.
Then click on Upload. The file will now be added to the display.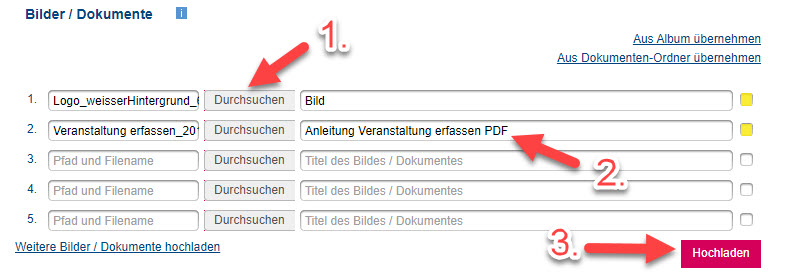
If you want to use the file more often, you can add it to your personal album. To do this, you can set a check mark after entering the file name, see yellow marking on screenshot.
TIP: Your event will look more attractive to searchers with a picture.
After filling in the form completely, you can click Next again.
2.3 Checklist
The Checklist window appears.
Select one or more suitable categories here.
Important: Selecting a category is mandatory for the publication of an event. If no category is set, no publication will take place.
Depending on which category you select, additional lines appear in the navigation on the left.
You can click through the checklist by clicking Next and insert necessary information in the next windows, but these further checklists are no longer mandatory fields.
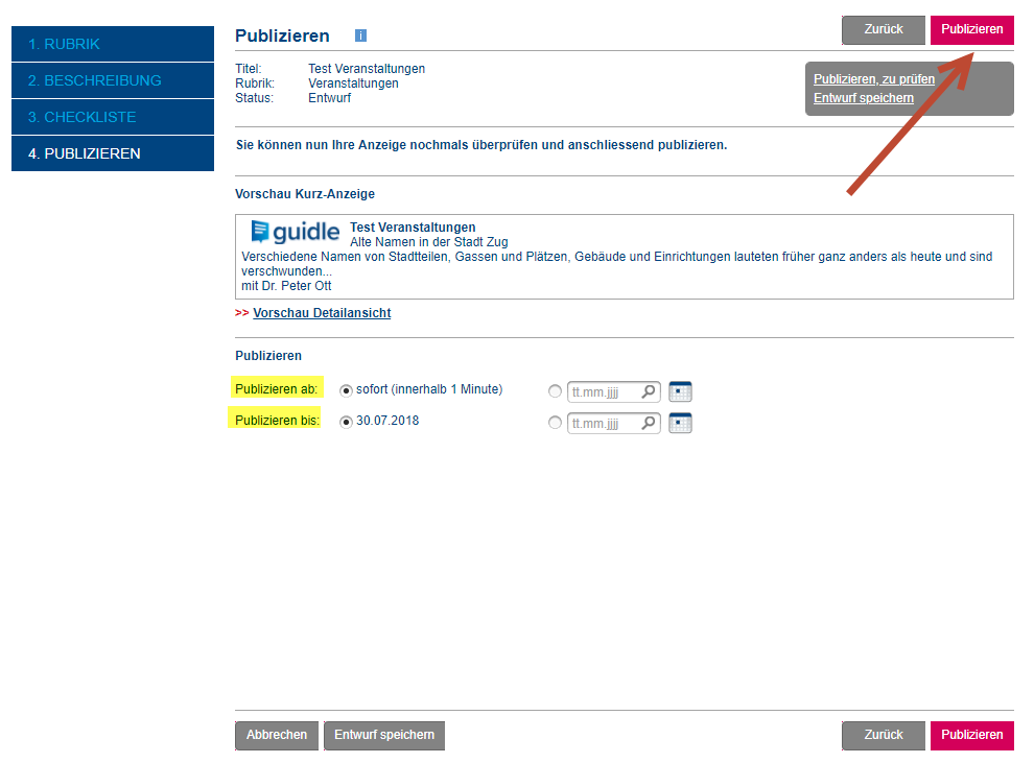
2.4 Publish
After filling out the checklist you will get to the Publish step.
Here you can check your event again using the preview mode and then save it as a draft or release it for publication.
If your ad should only be published on a certain date, you can enter this under Publish from.
The last day of the event date is automatically used as the publish to date, we do not recommend adjusting this date.
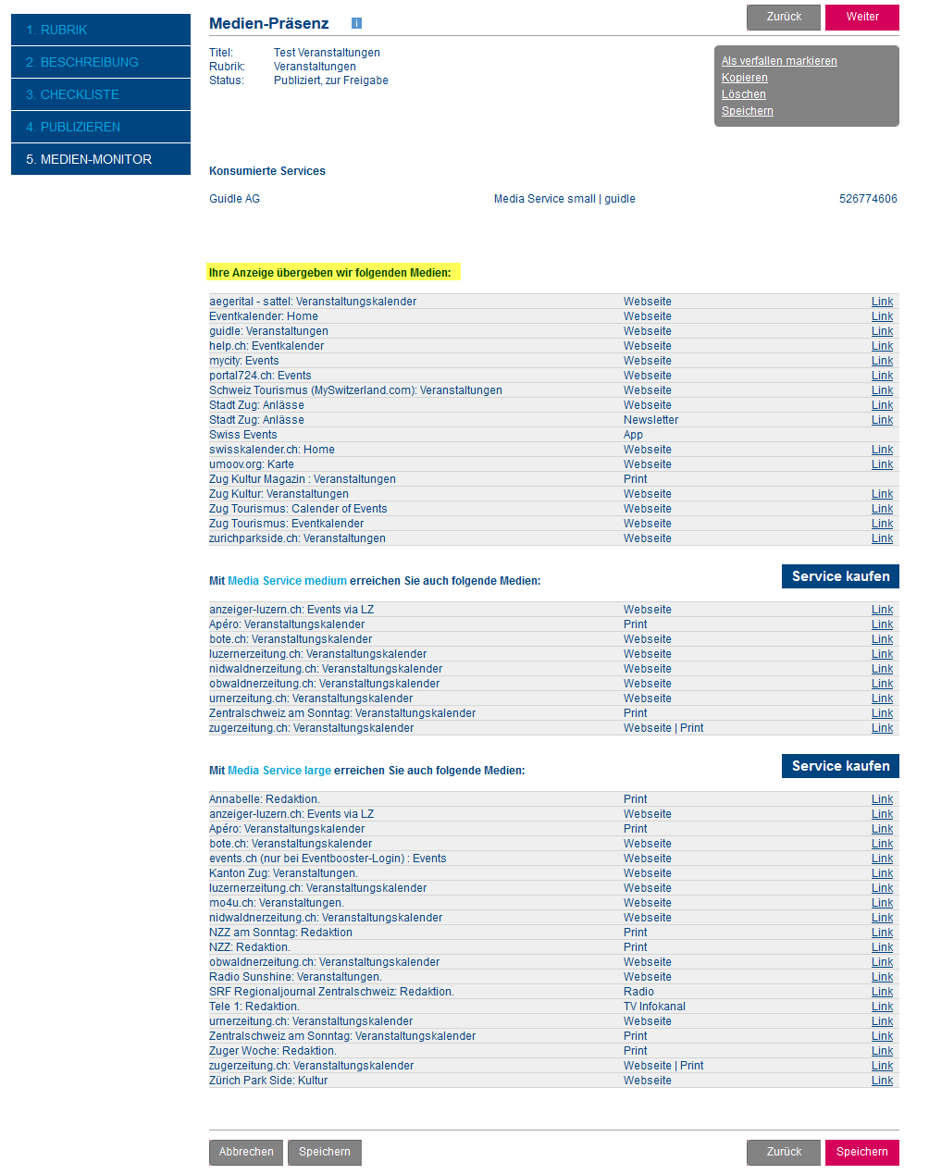
2.5 Media Monitor
In this step you can see to which media your ad will be transmitted. You can also purchase services for broader distribution of your event.
Do you have any questions? The guidle support team will be happy to help.
support@guidle.com | 041 766 95 95
Note: This text was translated by machine translation software and not by a human translator. It may contain translation errors.
Autor
guidle | FAQ
Contact
Guidle AG
Marktgasse 8
6340 Baar
support@guidle.com
+41 41 766 95 95
Category
- Description
Published on
Category
- Description
Webcode
www.guidle.com/2aP5UK